Andrew Mowry build
Growing up in Vermont, Andrew Mowry started building archtop mandolins in his teens. After a brief career in geology and geography he began selling instruments and transitioned to full time luthiery in 2005. Though Andrew still specialises in mandolin-family instruments, he also builds a few L-5 style guitars each year.

Peter Jung L-5
Andrew talks us through the various procedures that he follows as he builds one of his L-5 style guitars:
“Peter wanted a fairly traditional L-5 but with a warmer sound and more modern look. We settled on an Adirondack (red) spruce top, quilted maple back and sides and X-bracing, the latter two features helping to warm up the tone and accentuate the low end.
“I begin building by cutting the interior blocks from mahogany. I then select the wood for the sides and thickness-sand them. Quilted maple comes from big leaf maple trees here in the Pacific Northwest, and is an exceptionally beautiful wood.
“The sides are bent using a horizontal form and an electric silicone, heating blanket controlled with a timer and rheostat.

Having assembled the sides and blocks in the mould, I glue in the lining strips. One thing I do differently than Gibson is to used reversed-kerf lining where the saw-kerfs are against the side wood rather than away from it. This makes the rib assembly much stiffer and gives a somewhat cleaner look.

“The top is carved on my CNC router. While some folks have mixed feelings about the use of CNC in luthiery, I find that it helps make instruments more consistent and enables small-scale luthiers to compete more easily with large manufacturers. I do rough carving of the tops and backs on the CNC, and then do the final graduations by hand.

“Having shaped the braces and cut the box joint where the two halves of the X brace cross, I glue in the brace with hot hide glue and cam clamps. I use hide glue for most parts of the instrument. It is resistant to ‘creep’ over time, pull joints tight as it shrinks and makes later repairs easier should the guitar ever need them.

“Now I’m ready to glue the top on. This is done while the rim assembly is still in the mould, so that it holds its shape.

“Once I have cut the dovetail for the neck using a router jig it’s time to ‘close up the box’! Here you can see the finished X brace after shaping and tuning (below). The next step is to glue the back on.

“The photo below shows the assembled bodies for all the instruments in this batch, which includes two L-5s, a mandocello, an octave mandolin, an F-5 mandolin, and an oval-hole A-model mandolin.
“After a preliminary sanding, I cut the binding channel using a special bearing guide that I made for my router table.
“Now I can install the binding, a process that takes a week or two for a batch of six instruments. Peter chose ‘tortoise’ celluloid binding for his guitar.


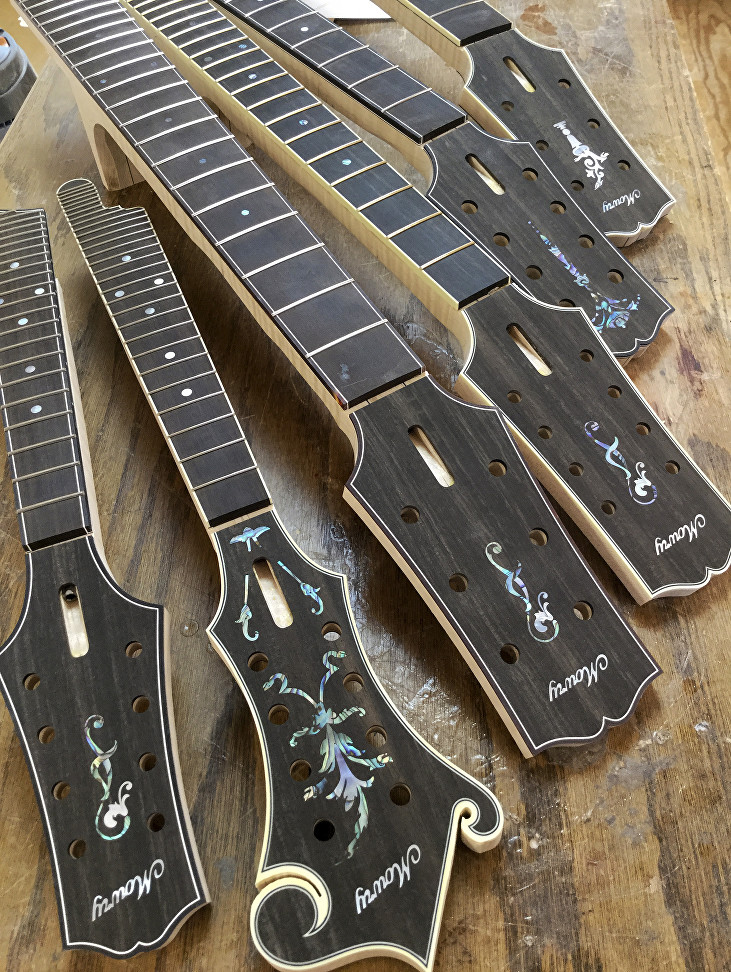
“Many people don’t realise it but the neck is the most time-consuming part of the instrument, with well over 100 individual pieces in some cases (including frets, inlay, and binding). I begin by making the ebony headstock overlay. Usually my batches of instruments have quite an assortment of headstock shapes!

“At this stage, I bind the headstock overlay. It’s much easier to do it now than later when it’s glued in place.
“In this photo (below), the inlay cavity has been cut. This is one of those areas where CNC really shines. I’ve cut many inlays by hand with a tiny pearl saw and I don’t miss breathing pearl dust and suffering from eyestrain!


“Next I begin making the fretboard, which is also cut on the CNC. I can make fretboards with any radius, width, etc. The following photo shows the fretboards with their binding and inlays.
“I cut the frets to length, undercut the tangs so the frets can overhang the binding, and then press them into place.
“Now I can start on the neck proper by laminating several layers of wood. I used curly red maple for the neck on Peter’s guitar, because I learned early on that big leaf doesn’t have the stiffness needed for necks. I cut the dovetail with a router jig and fine-tune it to match the mortise in the body. Next I cut the slots for the neck reinforcement, which in this case is a two-way adjustable truss rod and two carbon fiber bars. After gluing on the headstock overlay I cut the headstock to its final profile and begin sanding it.
“Having glued the fretboards on, I shape the necks by hand with a rasp, various chisels, and files. Necks can be carved on the CNC, but shaping them by hand makes it easier to customise the profile.


“Turning my attention back the body of the instrument, I scrape the binding flush with the wood. Once the neck has been glued in place I give the entire instrument a final sanding, raising the grain with water a few times during the process.
“At this point I’m ready to begin the finishing process, which takes about six weeks in total. I stain the bare wood with alcohol-based dye, rubbing it on by hand. I prefer this approach to spraying because it highlights the figure and other details in the wood and gives it a more organic look that is similar to the old Gibson finishes. You can’t get a 1920’s-style sunburst by spraying alone! If necessary I’ll spray parts of the instrument to darken them up after doing most of the colour by hand. I then spray a light coat of sealer and scrape the stain off the binding. The colour still looks drab at this point until the topcoats begin to go on.

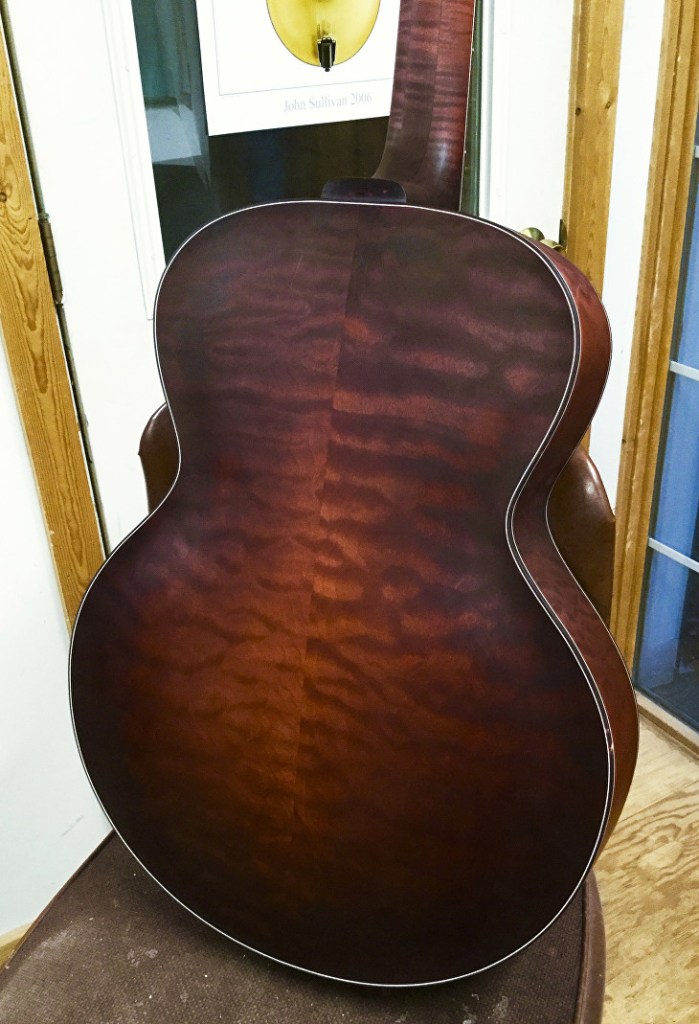
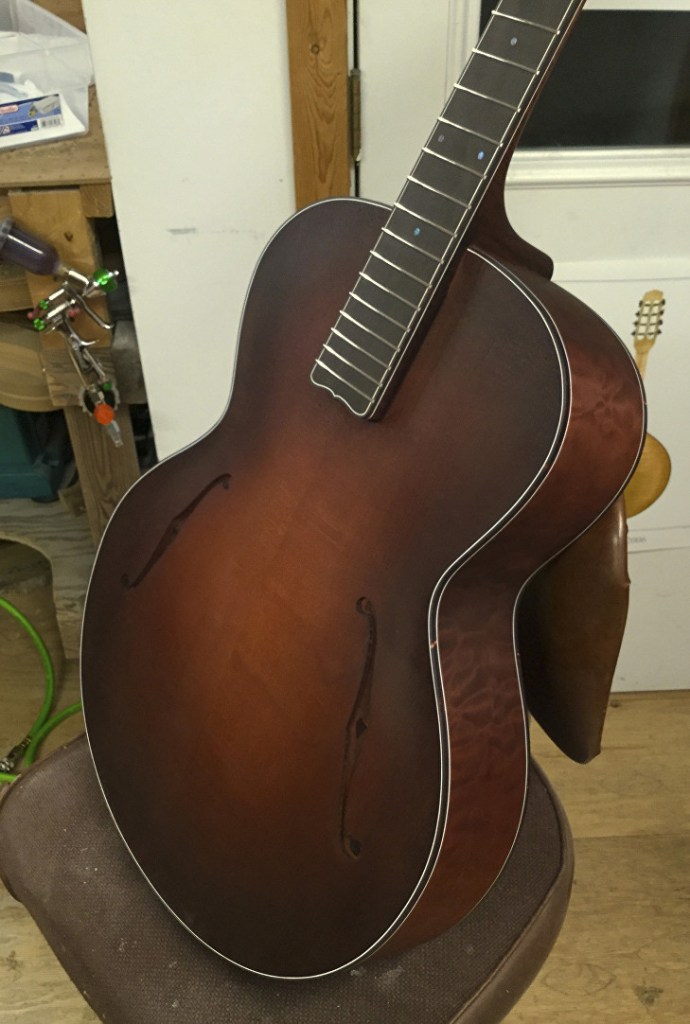
The nitrocellulose topcoats have been applied here with many hours of sanding between coats. I allow them to cure for a few weeks before final sanding and buffing. You can see the colour better now. I have used it on many of my instruments and call it ‘chestnut’.

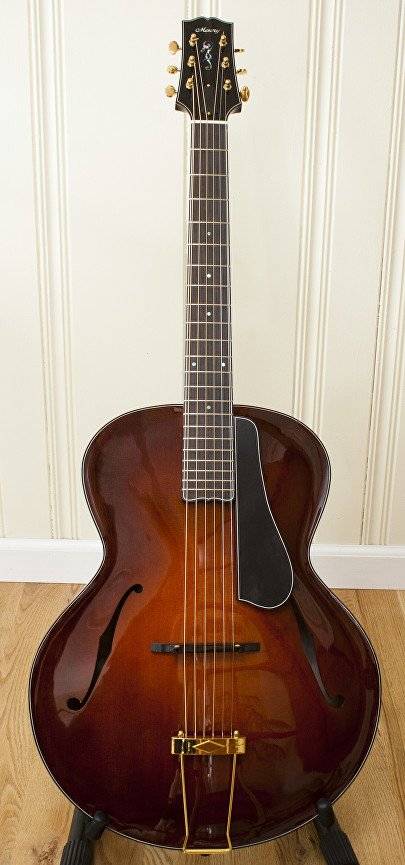
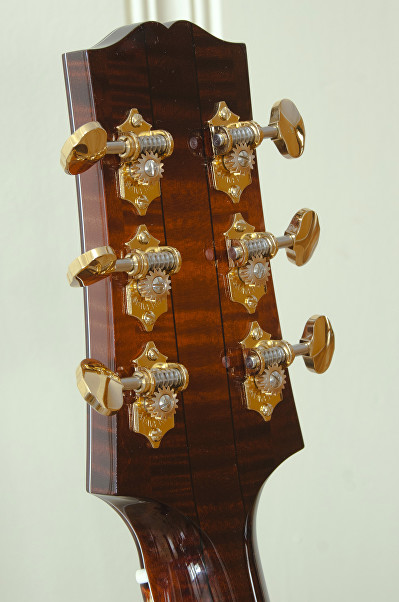
Finally I make the nut and bridge, install the hardware and do the final setup.
Here’s the finished guitar!